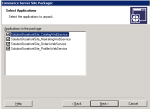
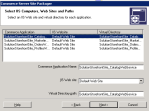
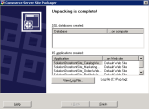
How to create Commerce 2009 R2 SubSystems web services

Following are the steps help you to create Commerce subsystems web services like Catalog, Marketing, Order and Profile.

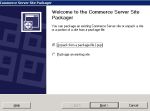
Step 1: Go to and select All Programs -> Commerce Server 2009 -> Tools -> Site Packager.

Step 2: Select option “Unpack from a package file”

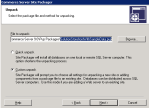
Step 3: Browse to *.pup file and select Custom Unpack

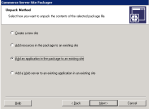
Step 4: Select option “Add an application to an existing site”

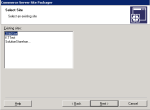
Step 5: Select existing Commerce site for which you want to create web services

Step 6: Select web services you want to create

Step 7: Configure IIS, web site and virtual path for web services

Step 8: On Next click, web services unpacking will start. It may take a while to complete.

Step 9: Last you will see message Unpacking is Complete!!!

Check gallery for visuals.

Basics of PowerShell

PowerShell Overview
It’s a Command Line Interface (CLI) uses different approach to expose information rather than GUI. CLI’s don’t have any pattern that helps us to learn the interface. So we have to remember all the commands before enter to CLI. Also terse names are used over clear once.
Windows PowerShell is based on objects. Whatever we type in text is stored as objects and output of one can be easily passed as input to another command. Windows PowerShell is based on the .NET Framework. Syntax features and keywords of PowerShell are very similar to C# programming language. So knowing C# makes easier to work with PowerShell. Also learning PowerShell makes it much easier to learn C#.
Commands executed in PowerShell are known as cmdlets (pronounced command-lets)

How to use commands
Lets see how to reach a command without knowing its complete name.
First find all the commands nearly close to known keyword. E.g. to find a list of cmdlets that view and change Windows service.

 get-command *-service

Now from list we can choose one command which we feel more relevant as per our requirement. Then we get complete details about that command using get-help command.

 get-help get-service

or

get-service -?

We have figure out that get-service is the command that we needed. Let’s run this cmdlet to displays information about the members of the object output by the Get-Service cmdlet.

get-service | get-member

Cmdlets Naming
Cmdlets Use Verb-Noun Names to Reduce Command Memorization.
To list all commands that include a particular verb with the -Verb parameter for Get-Command. For example, to see all cmdlets that use the verb Get, type:

Get-Command -Verb Get

The -Noun parameter is even more useful because it allows you to see a family of commands that affect the same type of object. For example, if you want to see which commands are available for managing services, type following command:

Get-Command -Noun Service

Parameters with Cmdlets
Parameter names always have a ‘-‘ prepended to them when you use them, to allow Windows PowerShell to clearly identify them as parameters. In the Get-Command -Name Clear-Host example, the parameter’s name is Name, but it is entered as –Name.

The Help Parameter (?)
When you specify the -? parameter to any cmdlet, the cmdlet is not executed. Instead, Windows PowerShell displays help for the cmdlet.

Common Parameters
Windows PowerShell has several parameters known as common parameters. Because these parameters are controlled by the Windows PowerShell engine, whenever they are implemented by a cmdlet, they will always behave the same way. The common parameters are WhatIf, Confirm, Verbose, Debug, Warn, ErrorAction, ErrorVariable, OutVariable, and OutBuffer.
How to get syntax of a command
To get the syntax of the Get-Help cmdlet, use the following command:

Get-Command Get-Help –Syntax

Displaying Available Command Types
To get command aliases, which are the assigned nicknames of commands, type:

Get-Command -CommandType Alias

To get the functions in the current session, type:

Get-Command -CommandType Function

To display scripts in Windows PowerShell’s search path, type:

Get-Command -CommandType Script

Using Tab Expansion

Tab expansion is controlled by the internal function TabExpansion. Windows PowerShell allows you to fill in file names and cmdlet names by pressing the Tab key. To fill in a filename or path from the available choices automatically, type part of the name and press the Tab key. Windows PowerShell will automatically expand the name to the first match that it finds. Pressing the Tab key repeatedly will cycle through all of the available choices.

One limitation of the tab expansion process is that tabs are always interpreted as attempts to complete a word. If you copy and paste command examples into a Windows PowerShell console, make sure that the sample does not contain tabs; if it does, the results will be unpredictable and will almost certainly not be what you intended.

User Word Automation Service using PowerShell

With PowerShell also possible to use Word Automation Service to convert documents to pdf, xps, etc formats.

Execute below script in PowerShell on your SharePoint Server. Don’t forgot to make necessary changes in script as per your environment. Also Word Automation Service should be in running state.

[void][System.Reflection.Assembly]::LoadWithPartialName("Microsoft.Office.Word.Server")

$jobSettings = New-Object Microsoft.Office.Word.Server.Conversions.ConversionJobSettings

$jobSettings.OutputFormat = "PDF"

$job = New-Object Microsoft.Office.Word.Server.Conversions.ConversionJob("Var Word Automation Service", $jobSettings)

$job.UserToken = (Get-SPWeb http://VarSiteName).CurrentUser.UserToken

$job.AddFile("http://VarSiteName/Document%20Library/VarDocName.docx", "http://VarSiteName/Document%20Library/VarDocName.pdf")

$job.Start()

For UI based solution check this link: SharePoint Document Converter

Play with SharePoint 2010 List using PowerShell

In this post, we will learn how to do basic operations on SharePoint list using PowerShell.

Lets start with List creation

$spAssigment = Start-SPAssignment    #Use to dispose SPWeb safely
$spWeb = Get-SPWeb ServerURL -AssignmentCollection $spAssignment     #Get SPWeb Instance
$spWeb.ListTemplates | Select Name, Description    #Display List of Templates Available
$spTemplate = $spWeb.ListTemplates["Custom List"]     #Create SPTemplate instance of Type Custom List
$spWeb.Lists.Add("List Title", "Description", $spTemplate)     #Add list to site

Add list to quick launch and fields to list

$spList = $spWeb.Lists["List Title"]    #Get list instance
$spList.OnQuickLaunch = $True    #Set true to display in Quick Launch
$spList.Update()    #Update list to reflect changes in site
$spFieldType = [Microsoft.SharePoint.SPFieldType]::Text      #Get Field type to create
$spList.Fields.Add("My Column", $spFieldType, $false)      #Add new field to list

Create View and set fields for view

$spViewQuery = “<OrderBy><FieldRef Name=”"Modified”" Ascending=”"False”" /></OrderBy>”
$spViewFields = New-Object System.Collections.Specialized.StringCollection    #Create string collection object
$spViewFields.Add("Title")    #Add columns
$spViewFields.Add("My Column")
$spViewName = "My View"        #Set view name
$spListView = $spList.Views.Add($spViewName, $spViewFields, $spViewQuery, 100, $True, $False, “HTML”, $False)    #Add view to list
$spListView.DefaultView = $True       #Set view as default
$spListView.Update()    #Update view to reflect changes in site

Add few List Items

$spListItem = $spList.Items.Add()    #Add new list item object
$spListItem["Title"] = "First Item"    #Set field value
$spListItem["My Column"] = "My Text for first item"
$spListItem.Update()    #Update list item object to reflect changes in site

$spListItem = $spList.Items.Add()
$spListItem["Title"] = "Second Item"
$spListItem["My Column"] = "My Text for second item"
$spListItem.Update()

Update List Items

$spListItems = $spList.Items    #Get list item collection
$spListItemsCount = $spListItems.Count    #Get list items total count
for($Counter = $spListItemsCount-1; $Counter -ge 0; $Counter--)
{
    $spListItem = $spListItems[$Counter]    #Get list item via index
    $spListItem["Title"] = "Updated Title" + $Counter
    $spListItem["My Column"] = "My Column" + $Counter
    $spListItem.Update()
}

Delete List Items

for($Counter = $spListItemsCount-1; $Counter -ge 0; $Counter--)
{
    $spList.Items[$Counter].Delete()    #Delete list item
}

Delete List

$spList.Delete()

Finally Dispose web object

Stop-SPAssignment $spAssignment


Happy Reading!!!

Extract WSP Solution files from SharePoint 2010 Farm

Before deploying updated WSP solution to SharePoint farm, administrators wish to take backup of current deployed solution in production servers just to stay on safe side. There is no option in CA to achieve this. Here is the script which gives us power to do.

(Get-SPFarm).Solutions | ForEach-Object{$var = (Get-Location).Path + "\" + $_.Name; $_.SolutionFile.SaveAs($var)}

To download single file use below script (Replace the YourSolutionFileName with actual WSP file name like abc.wsp):

$var = (Get-Location).Path + "\" + "YourSolutionFileName";(Get-SPFarm).Solutions["YourSolutionFileName"].SolutionFile.SaveAs($var)

$var = (Get-Location).Path + “\” + “YourSolutionFileName”; (Get-SPFarm).Solutions[“YourSolutionFileName”].SolutionFile.SaveAs($var)

Enable PowerShell ISE for Windows Server 2008 R2

Windows PowerShell ISE (Integrated Scripting Environment) is a host application for Windows PowerShell.In Windows PowerShell ISE, you can run commands and write, test, and debug scripts in a single Windows-based graphical user interface. Its features include multiline editing, tab completion, syntax coloring, selective execution, context-sensitive Help, and support for right-to-left languages.

By default this feature is shipped with PowerShell 2. If you are not able to find shortcut for Windows PowerShell ISE, it means you have to add this feature explicitly. Following steps will guide you how to add this feature:

Step 1 – Open PowerShell and Import Module Server Manager

            Exec command: Import-Module ServerManager

Step 2 – Now search for PowerShell ISE featurein Windows Features

            Exec command: Get-WindowsFeature -Name *PowerShell*

Step 3 – Verify PowerShell-ISE feature must present in above command result list. Now lets add this feature.

            Exec command: Add-WindowsFeature PowerShell-ISE

After executing above commands successfully. You can search Windows PowerShell ISE shortcut in start menu or simply type ise in PowerShell to open editor. There are few other ways to open PowerShell ISE that you guys can explore your own ;).

SharePoint 2010 File Storage System

SharePoint provide us a nice UI to store and read documents. But what happen behind the scene. Where it store all the files???

File System or Content Database

When we open document library in windows explorer view, SharePoint allow us to delete/update/add files as we do in the normal file system. So, what does it mean that files are stored in a physical location.

Nope. Not with SharePoint. It keep all the documents in a database. Ooooh database!!!

Doesn’t sound good to keep the documents in a database. What if my file size is big. Will it not slow down the performance as SQL BLOB operation are costly than accessing file from a physical path. Even SQL Express editions has limitation on database size (approx 10GB i think). Do to SQL storage, SharePoint allow file upload of max 2GB.

Cons with Content Database

– Costly SQL operations

– Limitation on file size

– Huge database size due to big files

Pros with Content Database

– Easy backup/restore process. As all data in one single file

With release of SharePoint, we have the option to configure storage of SQL Binary Large OBjects (BLOB) to physical file system. In SQL Server 2008 (including express 🙂 ), Microsoft provided an add-on feature pack called Remote Blob Storage (RBS) used for storage of BLOB to physical location.

Lets start how we can enjoy RBS feature with SharePoint 2010. Below post will explain how to configure RBS for SharePoint 2010.

Step 1. Select the Content database for RBS. (It is possible to limit the RBS per Web Application level)

a. Open Central Administration Site -> Application Management -> Manage Content Databases

b. Select Web Application for which you want to enable RBS. Note down the content database name for selected Web Application.

Step 2. Enable file stream on SQL Server 2008/R2 (including express edition)

a. Open SQL Server Configuration Manager -> SQL Server Services

b. Right click SQL instance on which SharePoint is running, and then select properties.

c. Select FILESTREAM tab -> checkbox Enable FILESTREAM for Transact-SQL access.

d. Select other checkboxes as per your requirement and click Apply -> Ok.

e. Open SQL Server Management Studio. Execute following query for Web Application Database as selected in step 1.

EXEC sp_configure filestream_access_level, 2
RECONFIGURE

Step 3. Provision a BLOB store

a. Open SQL SERVER Management Studio. Execute below queries for Web Application Database as selected in step 1. Note: Replace WSS_Content as per step 1.

use [WSS_Content]
if not exists 
(select * from sys.symmetric_keys 
where name = N'##MS_DatabaseMasterKey##')
create master key encryption by password = N'Admin Key Password !2#4'
use [WSS_Content]
if not exists 
(select groupname from sysfilegroups 
where groupname=N'RBSFilestreamProvider')
alter database [WSS_Content]
add filegroup RBSFilestreamProvider contains filestream
use [WSS_Content] 
alter database [WSS_Content]
 add file (name = RBSFilestreamFile, filename = 
'c:\Blobstore') 
to filegroup RBSFilestreamProvider

Step 4. Install RBS.

a. Download installation package using links: X64 Package X86 Package IA64 Package

b. Install RBS client library on the web server. Note: Replace WSS_Content as per step 1 and DBInstanceName as per your SharePoint environment. Locate cmd prompt to download folder and execute following command.

msiexec /qn /lvx* rbs_install_log.txt /i RBS-x64.msi TRUSTSERVERCERTIFICATE=true FILEGROUP=PRIMARY DBNAME="WSS_Content" DBINSTANCE="DBInstanceName" FILESTREAMFILEGROUP=RBSFilestreamProvider FILESTREAMSTORENAME=FilestreamProvider_1

Step 5. Enable RBS

a. Open SharePoint 2010 Management Shell and execute following commands. Note: Replace WSS_Content as per step 1.

$cdb = Get-SPContentDatabase <ContentDatabaseName>
$rbss = $cdb.RemoteBlobStorageSettings
$rbss.Installed()
$rbss.Enable()
$rbss.SetActiveProviderName($rbss.GetProviderNames()[0])
$rbss

Step 6. Test RBS Installation
a. Browse to RBS directory store and confirm folder is empty.
b. Upload a file to SharePoint Web Application (of atleast size 100 Kb).
c. Browse to the file in the RBS directory store and open the file with the most recent modified date. This should be the file you have uploaded.

Cheers !!!

SharePoint 2010 complete farm installation without domain account

Usually while SharePoint installation we have to select between Standalone and Farm installation. For Standalone installation we don’t need a domain account. It is automatically configured to use local service accounts. But if we have installed SharePoint with Farm Complete setting and still want to use the local service account during for SharePoint configuration.

In normal scenario, we get the below error message while running SharePoint configuration Wizard first time.

The specified user xxx is a local account. Local accounts should only be used in stand alone mode.

Now comes the tricky part. How to bypass this step. This can be achieved by performing below steps:

1. Run SharePoint PowerShell with administrator privileges

2. Run command: New-SPConfigurationDatabase (Provide all the necessary parameters)

3. Make sure provided service account is member of local Administrator group.

4. Now run the SharePoint configuration wizard again. You won’t be asked to enter the domain account.

Cheers!!!

Amazing Uncommon Facts

Q:> Why Microsoft named ISAPI folder as _vti_bin in SharePoint?
Ans:> Microsoft acquired software company called Vermeer Technologies Incorporated which is founded in 1994 and has only one product Front Page.
The _vti_bin folder was used to store the FrontPage server-side extensions. In SharePoint same is used to store the Web Services.

Q:> Why SP workflow doesn’t start automatically when item is created via object model?

Ans:> Many times we have requirement to create a task via workflow or object model and set the list setting to automatically trigger the workflow when item is created. In some scenarios we notice that item is created successfully but workflow doesn’t start. But if we create item via UI then workflow works perfectly. Here is a small tip to debug this issue.

If item is created via system account workflow will not trigger automatically. Same applies to event handlers.

Working with SharePoint Client Object Model

Till SharePoint 2007 we are familiar with SharePoint server object model which is very powerful and allow us to do everything if we have permission to access server physically. For scenarios where our applications can’t be deployed to SharePoint (SP) server but want to use SharePoint as a data source. We go with SharePoint OOB web services (which are limited in functionality) or end up with creating custom services to meet business requirements. In case of custom services, still we need SharePoint server access to deploy our services. Think about scenarios, where it’s impossible to have server access like SharePoint on cloud server (may be one possible scenario). Providing someone access to SharePoint root server on cloud is very risky. Or think about some other department want to use our SharePoint instance. We are forced not to let them deploy there applications on SharePoint server. What could be the possible solution to this? “SharePoint Client Object Model” is the shining star comes with SharePoint 2010.

SharePoint exposes 3 object models:

  1. Managed
  2. Silverlight
  3. ECMAScript (Standardized scripting language like JavaScript or JScript)

Before we go to what each object model do let’s see how client object model works.

When we make a call to SharePoint via client object model,  each client interact with server using service call means client object model makes call to SharePoint service Client.svc (deployed on SharePoint server and act as an interface between Client object model and SharePoint). I hope we all know where SharePoint services are deployed. If don’t know problem you can find it under ISAPI folder of 14 hive. Below is the architectural diagram explains how client access SP server:

Brief about each client object model:

Managed – used to develop custom .NET applications like service, windows applications (WPF), or console applications.

Silverlight – As name signifies it is used by Silverlight applications.

ECMAScript – These are little different than other client object models. These are used inside applications which are hosted inside SharePoint application itself.  In simple terms, cross side scripting is not allowed via ECMAScripts. These scripts should be used on SharePoint pages to access hosting server resources not others. We can use JavaScript or Jscript to achieve same.

Let’s go further deeper. Now we will create applications using each object model to perform CRUD operation on a list.

CRUD operation on a list using Managed Object Model

Step 1: Create a Console application

  1. Open Visual Studio 2010 (Run as Administrator).
  2. Select Windows Console application template (Check you are using .NET Framework 3.5).
  3. Name the project as you like and click ok button.

Step 2: Add SharePoint Client Object Model references

  1. Copy Microsoft.SharePoint.Client.dll and Microsoft.SharePoint.Client.Runtime.dll from SharePoint server ISAPI folder (inside 14 hive) to your project folder.
  2. Right click on project and select Add Reference.
  3. On Add Reference window, select Browse tab and navigate to location where you have copied DLL files. Add both files to project.

Step 3: Write necessary code to do CRUD operation

Copy paste code from attached file to Program.cs file and run your project. (Don’t forget to replace siteURL variable with your server name).

Program

This is just a simple example to start with. We can do lot more with Managed client object model.

CRUD operation on a list using Silverlight Object Model

Silverlight Object Model is slightly different in a way we make call to SharePoint from managed object model. Most of the calls made via Silverlight object model are asynchronous; these calls should not update the current running UI thread. If try to do we will get exception.

Another thing before start is we must place the ClientAccessPolicy.xml file in the SharePoint web application virtual directory. Here is content of xml file:

<?xml version=”1.0″ encoding=”utf-8″ ?>

<access-policy>

<cross-domain-access>

<policy>

<allow-from http-request-headers=”*”>

<domain uri=”*” />

</allow-from>

<grant-to>

<resource path=”/” include-subpaths=”true” />

</grant-to>

</policy>

</cross-domain-access>

</access-policy>

Let’s start with our Silverlight application.

Step 1: Create a Silverlight project

  1. Open Visual Studio 2010 (Run as Administrator).
  2. Select Silverlight application template (Check you are using .NET Framework 3.5).
  3. Name the project as you like and click ok button.

Step 2: Add SharePoint Silverlight Client Object Model references

  1. Copy Microsoft.SharePoint.Client.Silverlight.dll and Microsoft.SharePoint.Client.Silverlight.Runtime.dll from SharePoint server ISAPI folder (inside 14 hive) to your project folder.
  2. Right click on project and select Add Reference.
  3. On Add Reference window, select Browse tab and navigate to location where you have copied DLL files. Add both files to project.

Step 3: Write necessary code to do CRUD operation

MainPage

Copy paste code from attached file to MainPage.xaml.cs file and run your project. (Don’t forget to replace siteURL variable with your server name).

CRUD operation on a list using JavaScript Object Model

JavaScript object model only works if we use inside current server context I mean from WebParts or Application pages etc. JavaScript object model can’t be used to have cross-site access. This behavior makes it different from above object models. We can also use jQuery in place of JavaScript.

Step 1: Create an empty SharePoint project

  1. Open Visual Studio 2010 (Run as Administrator).
  2. Select SharePoint Empty Solution template (Check you are using .NET Framework 3.5).
  3. Name the project as you like and click ok button.

Step 2: Add Application to project

  1. Right click on project and select Add New Item.
  2. Select Application Page and click ok.

Step 3: Write necessary code to do CRUD operation

JavaScriptOM

  1. Copy paste code from attached file to ContentPlaceHolderID=”PlaceHolderMain” In JavaScriptOM.ascx file.
  2. Press F5 to run project. Modify url to view application page like Http://servername/_Layouts/ApplicationFolderName/ApplicationPageName.aspx
  3. Test each CRUD operation

Thant’s all with the SharePoint Client Object Model. More details can be found on Microsoft MSDN. It’s very well documented there.

Links worth looking at:

Client Object Mode

JS Client Object Model and UI Enhancements